The Complete AI Video Workflow: Text → Image → Motion → Lip Sync → Clips
A repeatable production workflow for turning a creative brief into a polished AI video, with checkpoints for stills, motion, dialogue, captions, and social cutdowns.
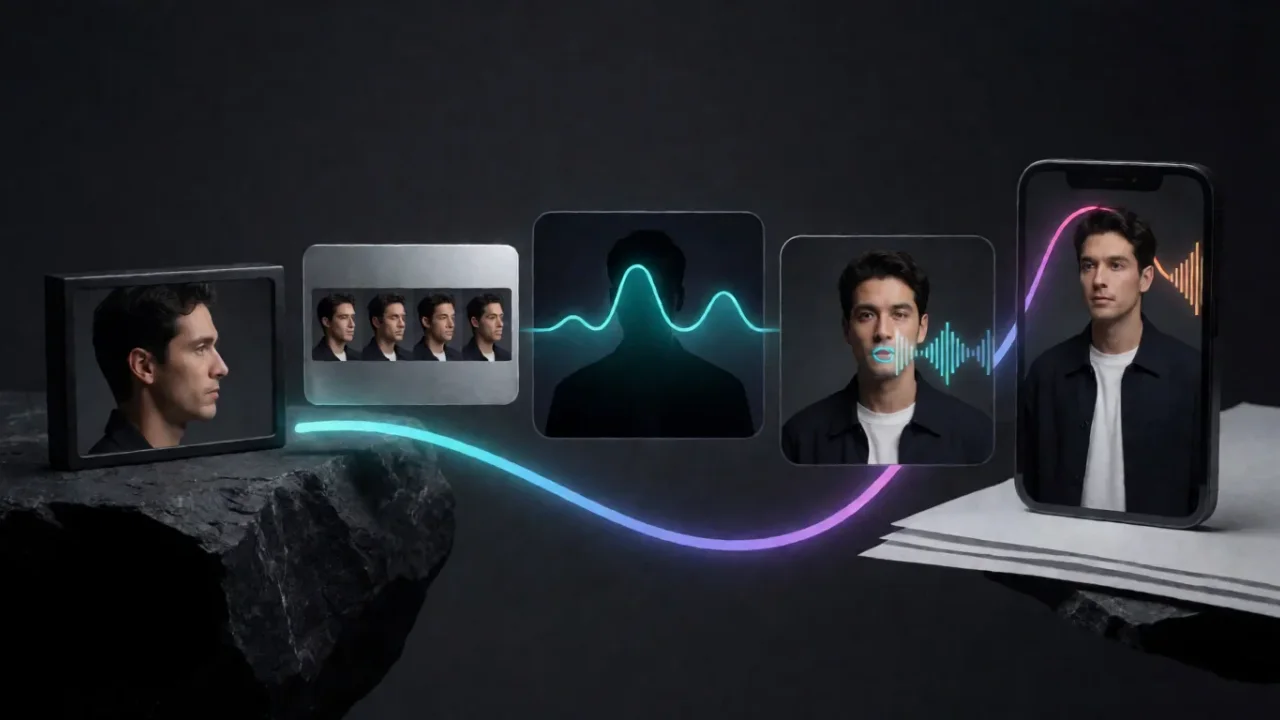
The workflow at a glance
The most reliable AI video projects are built in stages. Create a visual anchor first, add motion second, synchronize dialogue third, and make platform-specific cuts last.
The sequence is:
1. Brief: define the audience, format, message, and delivery channels.
2. Key frame: create or select the still image that establishes identity.
3. Motion: animate the key frame or generate a shot from text.
4. Dialogue and sound: add voice, music, effects, or lip sync.
5. Repurposing: cut the result into short clips and aspect-ratio variants.
1. Start with a production brief
Write down the output before opening a model:
- Audience and platform.
- Primary message or action.
- Duration and aspect ratio.
- Required product, person, or brand details.
- Number of final variants.
This prevents the common mistake of generating a visually impressive clip that does not have a usable ending or a format appropriate for the channel.
2. Create a key frame
Use Image Studio for general image generation or Cinema Studio when lens, aperture, and photographic treatment matter. Treat the key frame as a visual contract: subject identity, product proportions, wardrobe, color, and composition should be decided here.
For a product ad, generate several controlled stills before moving into video. Pick one frame with a clean silhouette and enough negative space for captions or a call to action.
3. Add motion deliberately
Send the selected frame into Video Studio. Keep the first motion prompt narrow:
Animate the product with a slow forward camera push. The product rotates a quarter turn, the background remains stable, and the light sweeps gently across the surface. Preserve the product shape, label placement, and color.
If the result drifts, simplify the action. One controlled camera move is easier to refine than a prompt that asks for a rotation, zoom, orbit, explosion, liquid effect, and scene change at the same time.
4. Add dialogue and sound
Record or prepare the dialogue before the final lip-sync pass. The line length affects framing, pacing, and the number of usable cuts.
Use Lip Sync Studio when a face must match spoken audio. Keep the source face well lit, front-facing enough for the intended movement, and free from objects covering the mouth.
For a video without a talking face, add voice-over and supporting sound separately. The visual does not need to generate every sound effect inside the video model.
5. Create platform variants
The master video is not the final deliverable. Use Clipping Studio to identify hooks, remove dead time, and produce short cuts. Plan for:
- A first-second hook for vertical feeds.
- A version with captions burned in or supplied separately.
- A square or landscape crop when the platform requires it.
- A clean version without text for future localization.
Keep the master file and each derivative clearly named. This matters more as the number of variants grows.
Quality checkpoints
| Stage | Approve only when |
|---|---|
| Brief | The audience, format, and message are explicit |
| Key frame | Identity and composition are usable without motion |
| Motion | The main action is stable and the ending is usable |
| Audio | Dialogue is intelligible and timing is intentional |
| Cutdowns | Each version has a clear opening and destination |
The production principle
Use the cheapest reliable stage to solve each problem. Do not spend repeated video generations trying to fix a product silhouette that should have been solved in the still-image stage. Do not use a lip-sync pass to repair unclear audio. Do not ask a clipping tool to invent a missing story beat.
Related articles
Explore Pixraft Multi-Model Studio
Generate images with Nano Banana Pro and FLUX, video with Kling 3.0, Veo 3.1 & Seedance 2.5, and lip-synced audio in one workspace.
Create Free Account →